Astrophotography for Beginners: Your Gateway to Cap
What if I told you that camera in your pocket could capture galaxies?
Last weekend, I watched a friend take their very first astrophoto using just their smartphone and a simple tripod. The look of wonder on their face when they saw the Milky Way appearing on their screen – stars and cosmic dust visible in ways the naked eye never could – reminded me why I fell in love with this hobby.
Astrophotography might sound intimidating, like you need a PhD in astronomy and thousands of dollars in equipment. But here’s the truth: anyone can start capturing the cosmos tonight.
What Is Astrophotography, Really?
Simply put, astrophotography is taking pictures of space. But it’s so much more than that.
It’s standing under a dark sky at 2 AM, watching your camera reveal hidden nebulae. It’s the patience to wait for that perfect moment when Jupiter aligns just right. It’s the thrill of processing your first image and seeing details invisible to the human eye emerge from the darkness.
Unlike regular photography, astrophotography is about collecting light over time. Where your eyes see a faint smudge, your camera can gather photons for minutes or hours, revealing incredible cosmic structures in stunning detail.
My Journey: From Smartphone Stars to Nebulae
 My very first astrophoto: a simple smartphone shot that revealed thousands of hidden stars
That smartphone success got me hooked, but I wanted more. A few months later, armed with a basic DSLR and the same tripod, I pointed my camera at what looked like an empty patch of sky in Orion. After a 30-second exposure, I chimped the back of my camera and gasped.
There it was – the Orion Nebula in all its glory. Swirling pink and red clouds of gas, hot blue stars, intricate details that my eyes couldn’t even hint at. I had captured a stellar nursery 1,300 light-years away, sitting in my backyard.
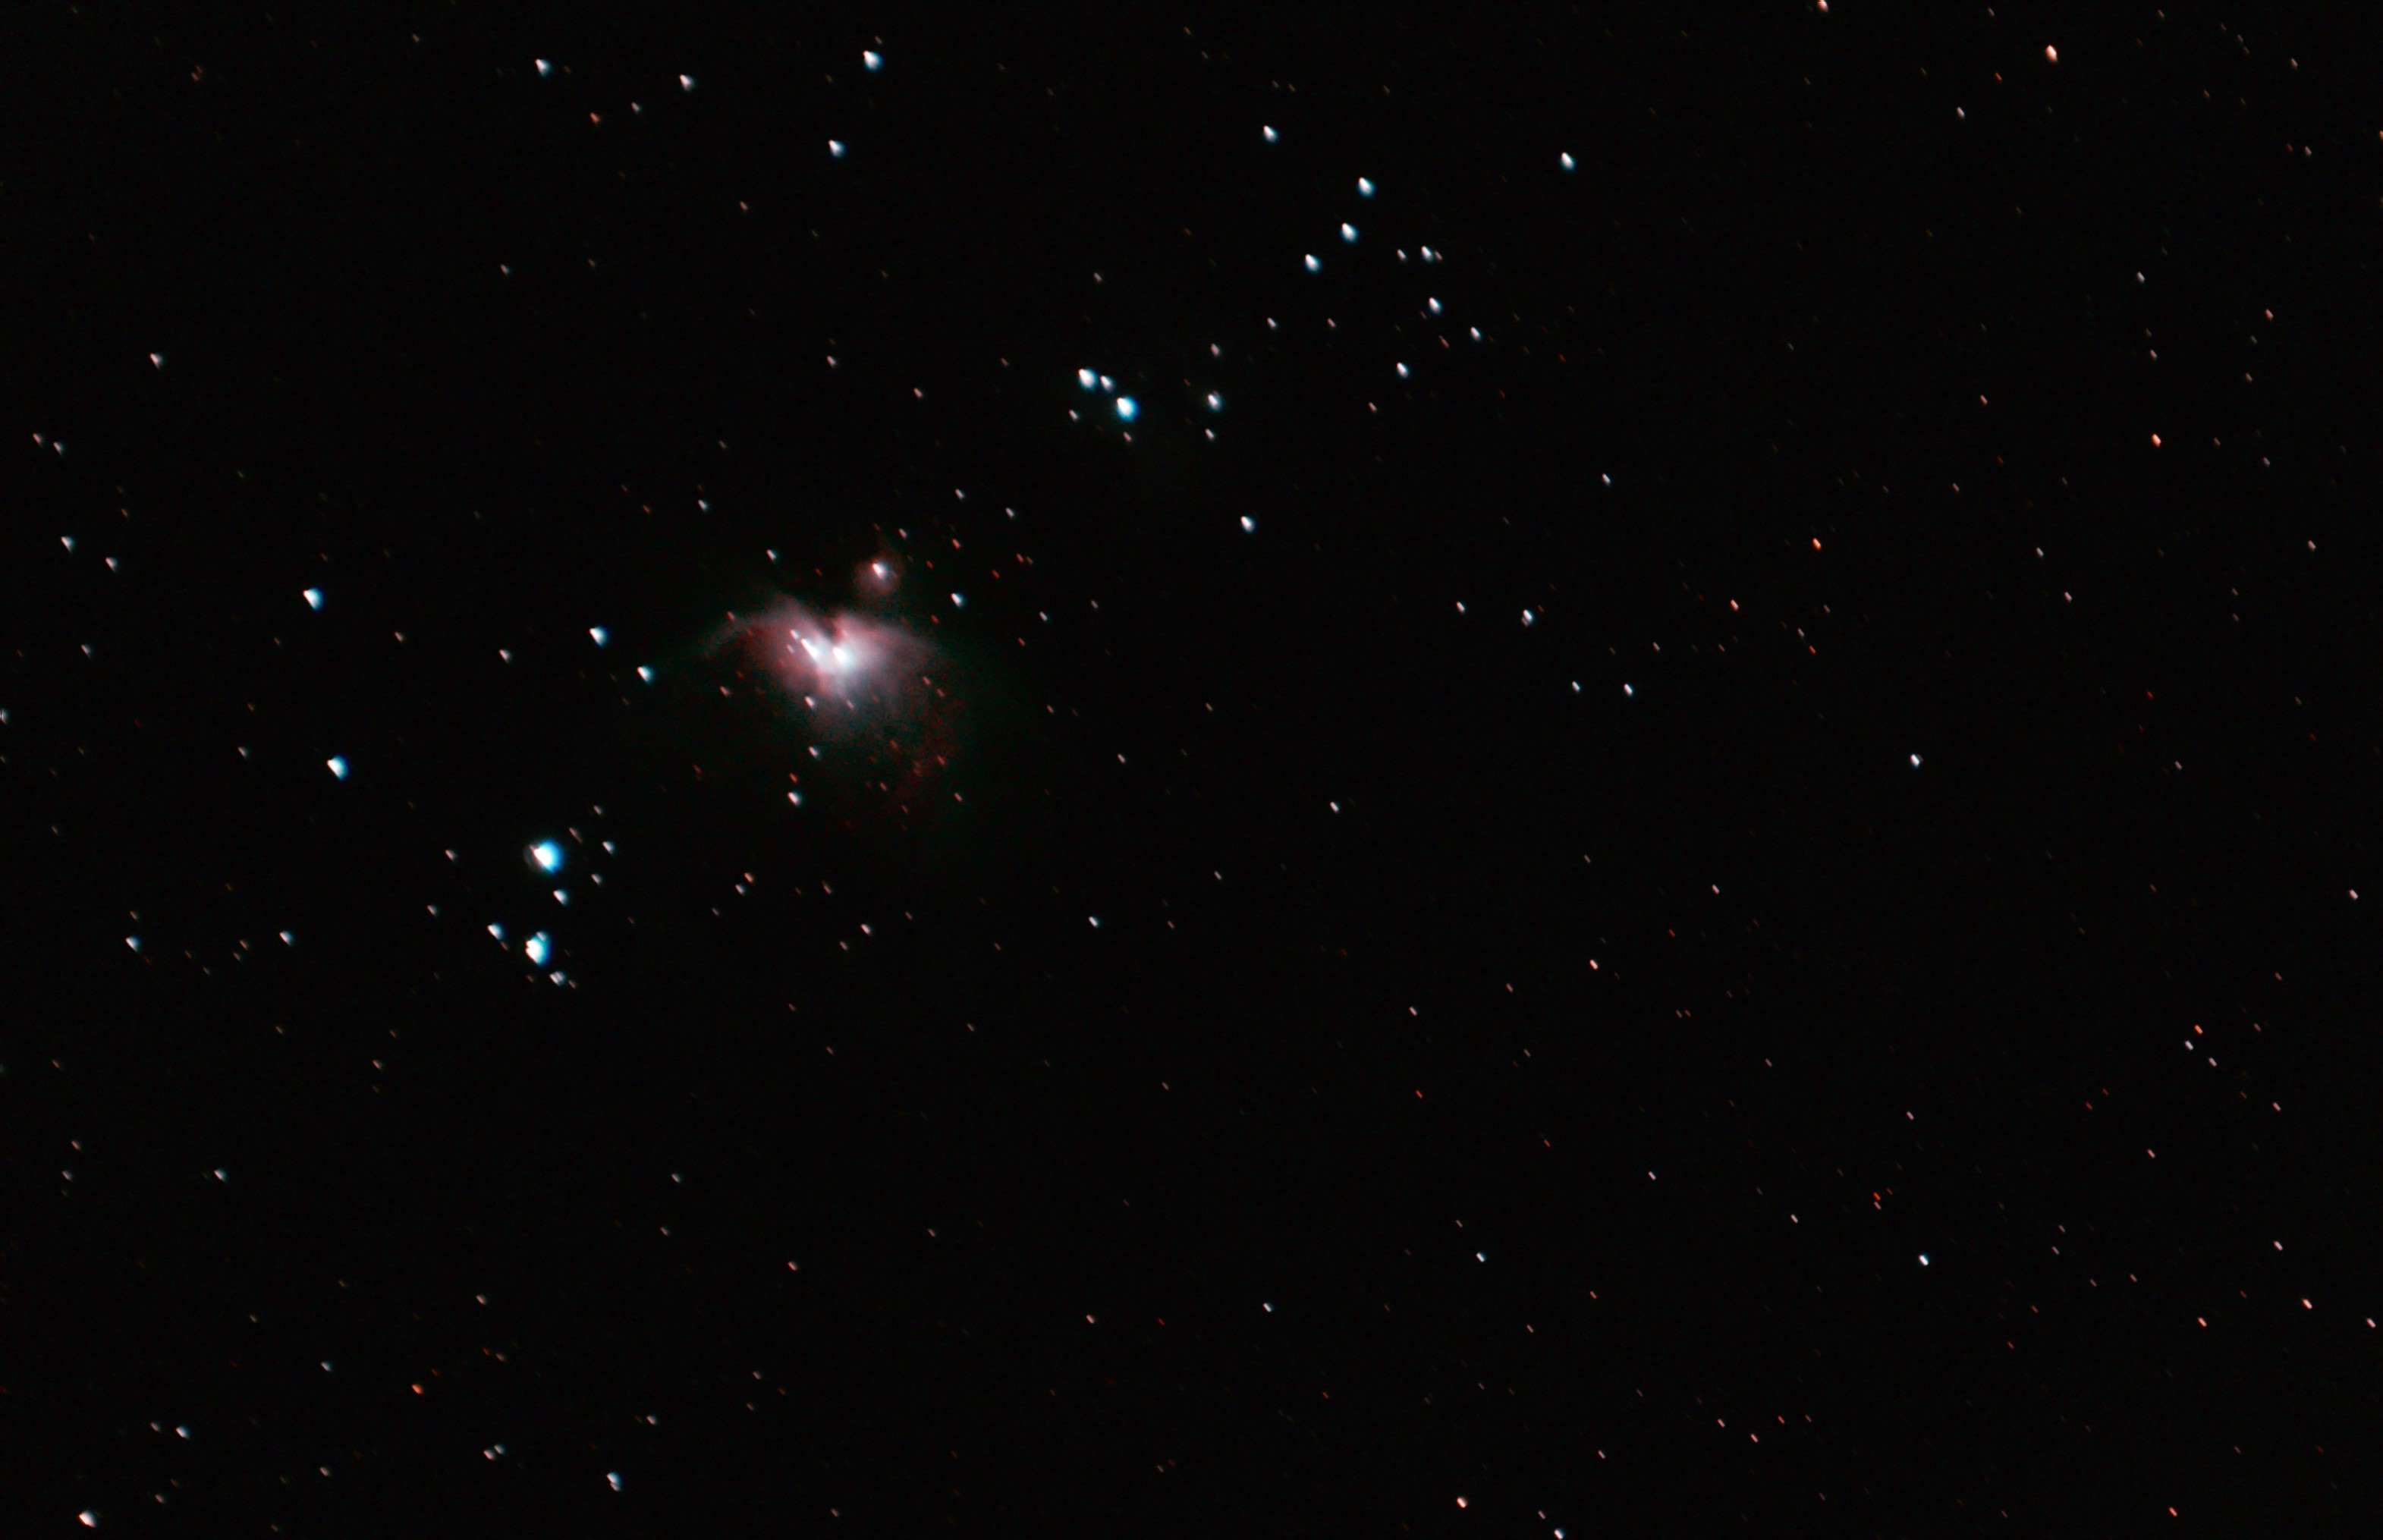 The shot that changed everything: my first capture of the Orion Nebula with a basic DSLR
That moment changed everything.
What Can You Actually Photograph?
The night sky offers an incredible variety of subjects, each with its own character and challenges:
The Moon – Your First Target
The Moon is astrophotography’s “Hello, World!” It’s bright, always changing, and incredibly detailed. Even a smartphone can capture stunning lunar landscapes.

Planets – Tiny Worlds
Jupiter’s Great Red Spot, Saturn’s rings, Mars during opposition – planets are small but full of character. You’ll need a telescope for detail, but seeing these worlds up close never gets old.
Star Trails – Time Made Visible
Long exposures turn Earth’s rotation into art. Stars become streaks of light painting circles around the pole star – a perfect introduction to long-exposure techniques.

The Milky Way – Our Cosmic Home
Nothing beats capturing our galaxy’s core rising over a landscape. It’s achievable with basic equipment and teaches you fundamental astrophotography skills.

Deep Space Objects – The Ultimate Challenge
Nebulae, galaxies, star clusters – these faint targets require patience and technique but offer the most rewarding results. Each one tells a story billions of years in the making.
Your First Equipment: Start Simple
Smartphone + Tripod ($30-50) Yes, really! Modern phones have surprisingly capable night modes. Apps like PhotoPills or Star Walk help you plan shots and control camera settings. This is exactly how I started – and those first smartphone shots of star fields full of hidden stars were absolutely magical.
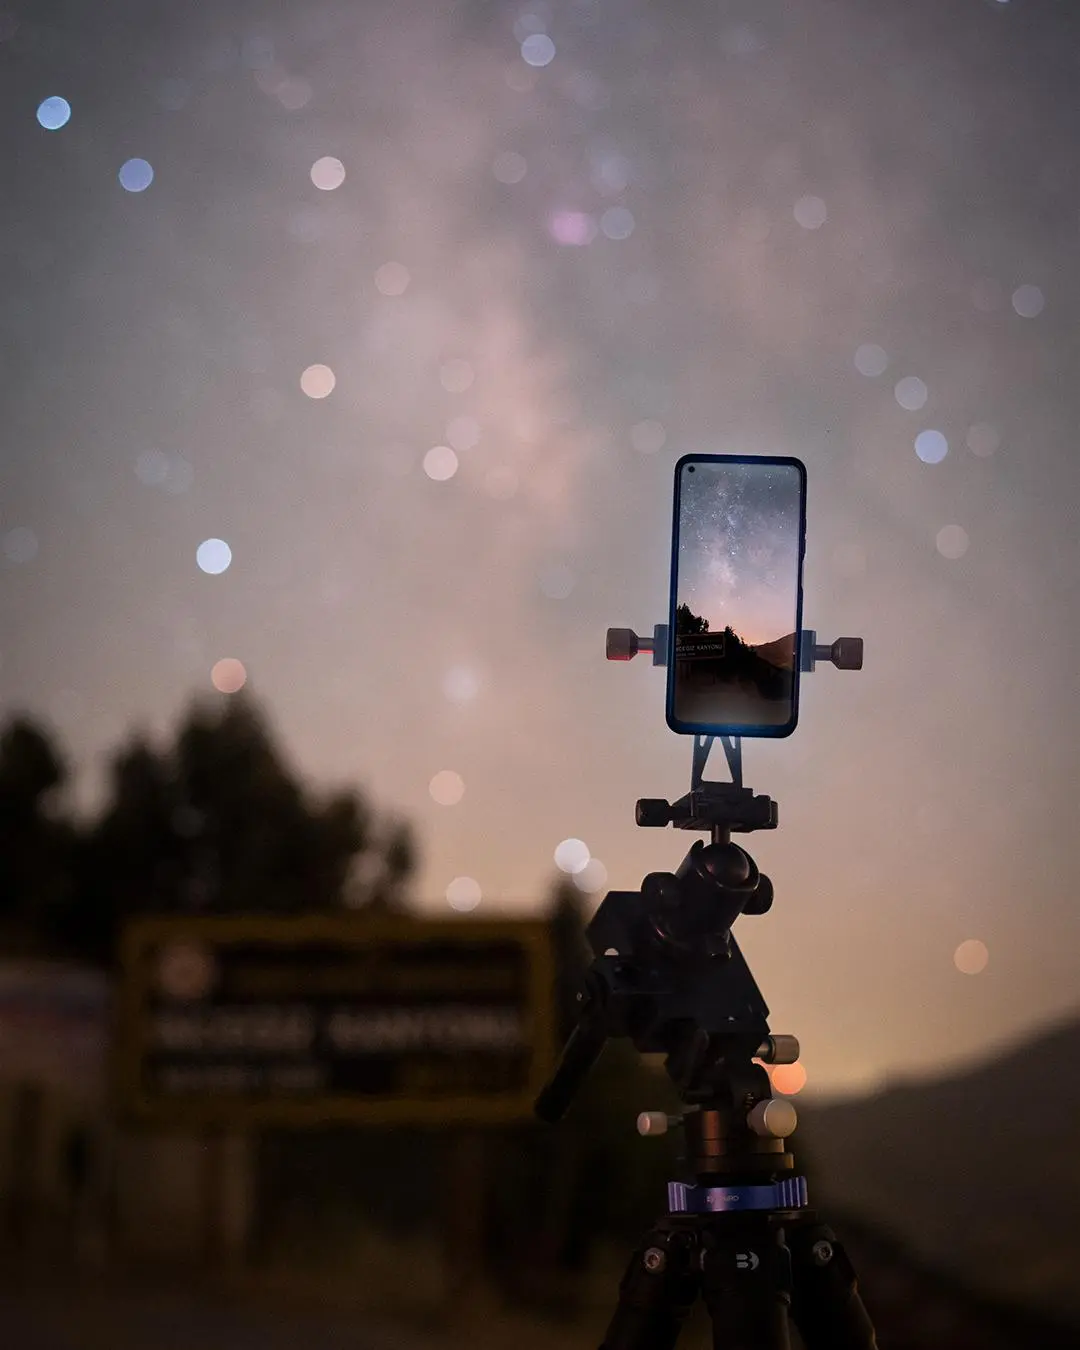 A simple smartphone and tripod setup can capture stunning star fields
DSLR/Mirrorless Camera + Tripod ($400-800) Any camera with manual controls opens up serious possibilities. You don’t need the latest model – many stunning astrophotos are taken with cameras over a decade old. My first Orion Nebula shot was with an entry-level DSLR that was already 5 years old!
Fast Wide-Angle Lens ($200-500) For Milky Way photography, a lens around 14-24mm with f/2.8 aperture or faster will gather maximum light and show expansive star fields.

Don’t buy expensive gear first! Learn with what you have, understand what you actually need, then upgrade strategically.
Essential Techniques Every Beginner Should Master
The 500 Rule
To avoid star trails in Milky Way shots: 500 ÷ focal length = maximum exposure time in seconds. With a 24mm lens, that’s about 20 seconds before stars start trailing.
Manual Focus on Stars
Autofocus struggles in darkness. Switch to manual, zoom in on a bright star on your camera’s LCD, and adjust until it’s a pinpoint. Use live view magnification for precision.
The Exposure Triangle
- ISO: Start around 3200-6400 for deep sky
- Aperture: Wide open (f/2.8 or faster) for maximum light
- Shutter Speed: Limited by the 500 rule or your tracking capability
Stacking for Better Results
Instead of one long exposure, take many shorter ones and combine them in post-processing. This reduces noise while maintaining detail – the foundation of modern astrophotography.
Your First Night Out: A Step-by-Step Plan
Before Sunset:
- Check weather and moon phase (new moon is darkest)
- Scout your location during daylight
- Download apps like PhotoPills to plan compositions
- Charge batteries and format memory cards
Setting Up:
- Arrive early, let your eyes adjust to darkness
- Set up your tripod on stable ground
- Compose your shot while you can still see
- Switch camera to manual mode
Taking the Shot:
- Start with test exposures – 15 seconds, ISO 3200, f/2.8
- Check histogram – aim for the mountain to be about 1/3 from the left
- Adjust ISO and exposure time as needed
- Take 20-50 frames of your target
Pro tip: Bring a red flashlight to preserve your night vision, and dress warmer than you think you need!
Common Beginner Mistakes (I Made Them All)
Expecting Instant Gratification Astrophotography rewards patience. Your first images might look disappointing straight out of camera – the magic happens in processing.
Buying Gear Before Learning Skills That $3000 telescope won’t automatically create better images. Master the fundamentals with simple equipment first.
Ignoring Light Pollution You can absolutely do astrophotography from the city! The Moon, planets, and bright targets are great urban subjects. Save the dark sky trips for faint nebulae.
Forgetting About Post-Processing Raw astrophotos look terrible – they’re meant to be processed. Learn basic editing in Lightroom, Photoshop, or free alternatives like GIMP.
Not Planning Shots The best astrophotographers are also the best planners. Know when and where your targets will be visible, and have backup plans.
Processing: Where the Magic Happens
This is where your raw captures transform into stunning images. Don’t be intimidated – start with these basics:
 The same image before (top) and after (bottom) basic processing - revealing hidden details
Lightroom/Camera Raw:
- Lift shadows dramatically
- Reduce highlights
- Increase clarity and texture on the Milky Way
- Adjust color temperature for pleasing tones
Dedicated Astro Software:
- DeepSkyStacker (free) for combining multiple exposures
- PixInsight (advanced) for serious processing
- Photoshop for final touches and compositing
 A typical processing workflow showing the transformation from raw capture to final image
The goal isn’t to create fake-looking images, but to reveal what was actually captured – details hidden in the darkness that your camera sensor recorded but aren’t visible in the raw file.
The Community That Makes It Special
One of astrophotography’s greatest gifts is its community. Visit any astronomy club, and you’ll find people eager to share knowledge, equipment, and dark sky sites.
Online Communities:
- r/astrophotography on Reddit
- CloudyNights forums
- AstroBin for sharing and feedback
- Local astronomy clubs and meetups
Annual Events: Many regions host star parties – gatherings where astrophotographers share equipment and techniques under dark skies. These events accelerated my learning more than any tutorial.
Why Start Now?
We live during a golden age of astrophotography. Camera technology improves yearly, making previously impossible targets accessible to beginners. Processing software grows more powerful and user-friendly. The barriers to entry have never been lower.
But beyond the technical aspects, astrophotography offers something profound: perspective. When you spend hours capturing ancient light from distant galaxies, everyday problems seem smaller. You’re literally connecting with the universe in a direct, tangible way.
Taking Your First Steps Tonight
If you have a smartphone: Download a night photography app, find the darkest spot you can, and photograph the Moon or bright constellations. Experiment with exposure times and see what happens. Trust me – you’ll be amazed at how many stars your phone can capture that you can’t even see!
If you have a camera: Head out after astronomical twilight (when it’s truly dark), find Polaris (the North Star), and try some star trail exposures. Start with 5-minute exposures and work up from there. Or point it at Orion and see if you can capture that nebula like I did!
Your first night out: simple setup, clear skies, and endless possibilities
If you want to learn more: Join your local astronomy club, follow astrophotographers on social media, and don’t be afraid to ask questions. This community loves helping newcomers discover the same wonder that captured us.
The Journey Begins
Astrophotography isn’t just about the final images – though those can be breathtaking. It’s about the quiet hours under starlight, the problem-solving, the gradual mastery of seeing the universe in new ways.
Your first astrophoto might be a simple shot of the Moon, or star trails over your house. But I guarantee this: once you’ve captured your first cosmic light, you’ll be planning your next clear night out.
The universe is waiting. All you need to do is point your camera up and press the shutter.
Ready to start your astrophotography journey? Check out recommended beginner gear list or follow me for more tips and inspiration. Clear skies!